Outlook Read Receipt: How to request & Turn off
There is a nice feature of how to inform the sender of the electronic mail that the recipient has read or opened the email that sent to him. With our instructions, you will learn on the one hand how to request an Outlook read receipt and turn off this feature for emails. And, you will set up an Outlook read receipt on your Mac as well.

What is an Outlook read receipt?
The Outlook read receipt ensures you that the recipient has actually opened your electronic mail.
Note: Before you set up for all emails you send, you should consider one important aspect. Put yourself in the place of the recipient who has to send a confirmation for every email he receives from you.
This can get pretty annoying pretty quickly! This can lead to the recipient setting up their Outlook so that Outlook read receipts are generally not sent back to the sender.
How can I request an Outlook read receipt?
First, proceed as you would with any new email you compose, i.e., click on the “New Email” envelope icon in the upper left corner. This will open a new email file that you can edit as usual.
In order to be able to request an read receipt,
- Click on “Options” in the tab line; this button is located two positions to the right of the “Message” tab, which is the default when composing a new email.
- To be able to set up an read receipt for this email, simply check the “Request a Read Receipt” box – and that’s it.
By the way, this principle also works if you want to send a reply to the sender. Here, too, click on “Options” in the open email window and check the box in front of “Request a Read Receipt“.
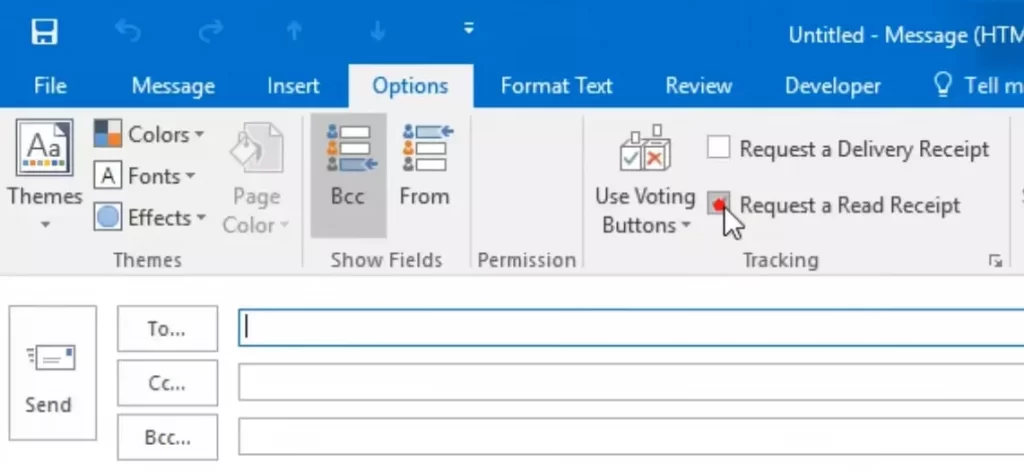
When you tick the box, the read receipt is activated for this email.
Set up an Outlook Read Receipt permanently
For example, suppose you are working with several colleagues on an urgent project and have formed an email group. In that case, it is important for all members to know whether their messages are actually being read. In this case, it is a good idea to set up an Outlook read receipt for all emails that you send.
Note: Keep in mind that then, of course, every addressee of your electronic messages will receive a request for Outlook read confirmation, not just the group members.
- Click “File” → “Options” in the menu.
- Now a new window will open, that “Outlook Options“.
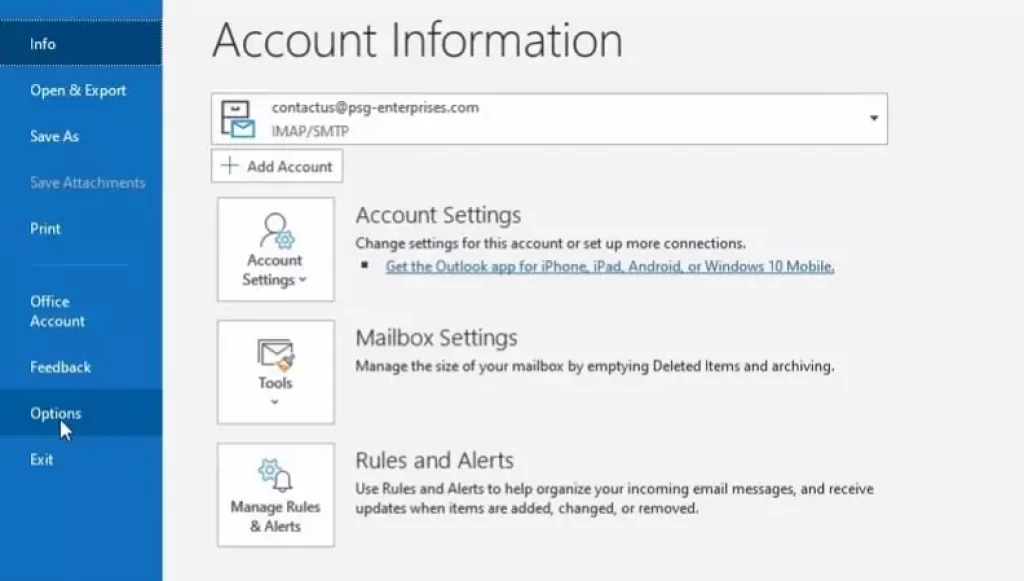
You can access this view via “File” in the main window. Select “Options” here.
- Select “Email” on the left
- Scroll down to the “Tracking” tab. Here you will find quite a few options.
- Place a check mark by “Read receipt confirming the recipient viewed the message“.
- To save, click the “OK” button.
- From now on, send an read receipt to your recipient with every sent email.
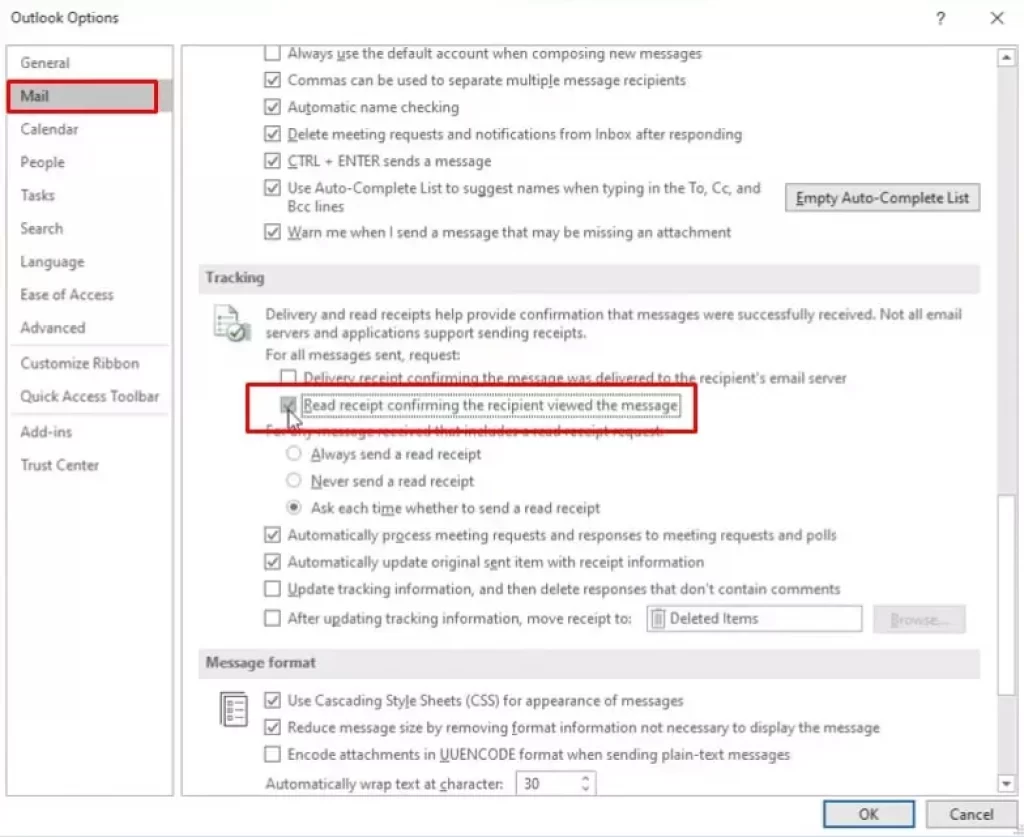
With these settings, your Outlook read receipt is permanently set up.
How can I turn off read receipt?
You don’t want to receive Outlook read confirmation anymore? Then go to the “Outlook Options” window again:
- Click on “File” → “Options” in the menu.
- Select “Email” on the left
- Scroll down to the “History” tab
- Place a check mark next to “Never send a read receipt“.
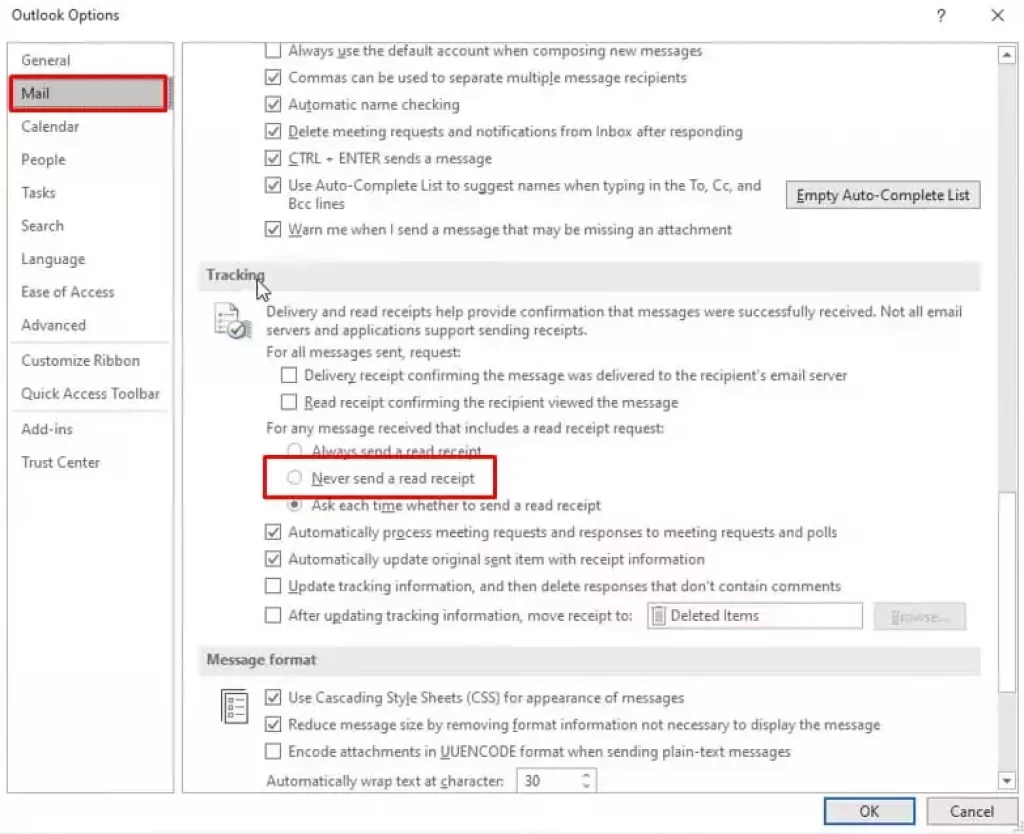
With this setting you will no longer receive Outlook read receipts.
Why am I not receiving an read receipt?
You can, of course, have the misfortune of having Outlook set up correctly and the recipient actually receiving your email – and still not receiving an read receipt.
Why? Quite simply. Because the recipient can decide not to send the confirmation in the dialog box that opens when the message is retrieved.
- For this, a simple click on the “No” button is enough.
- After all, you can’t force the recipient to send the Outlook read receipt back to you.
- Or the recipient has checked the “Never send a read receipt” box.
Request read receipt with macOS Mail?
You cannot enable an email read receipt by default on your Mac. This is considered rude in America. However, with the help of a tool, you can activate the read receipt. The only requirement is that you have Mac OS X 10.8 or higher installed.
Read receipts are only available in some versions of Outlook for Mac. And only when using a Microsoft 365 business, university or school account – or an Exchange Server account that your organization manages.
Supported versions/applications include:
- Outlook for Microsoft 365 and
- Outlook 2019 for Mac, version 15.35 (170610) and above.
You can read these related articles: How do I open a Winmail.dat file?